Roofing Jacks
When paired with planks, these simple brackets can make working on a steep roof safer, easier, and more comfortable.

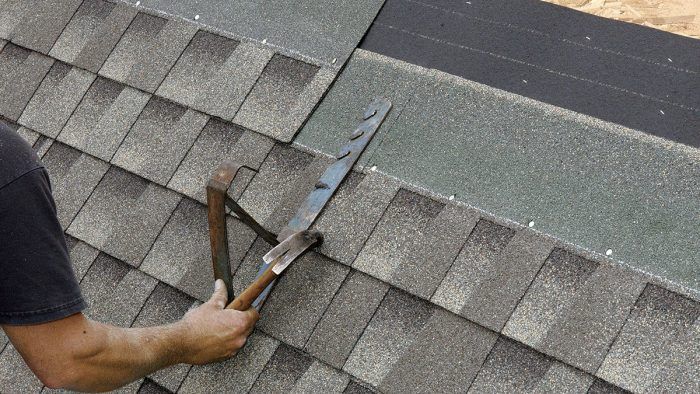
Roofing jacks provide safe platforms on slopes. Typically, install a pair of jacks for every six to eight courses. To attach the jacks, level the pair by aligning the jacks to horizontal chalklines, and drive two 10d galvanized common nails through each jack into rafters. (Jacks nailed only to sheathing are unsafe.) Place nails above the fastener line on the shingle because the nails will stay in place after jacks are removed.
If you space each pair of jacks 8 ft. apart horizontally, they can be spanned by 10-ft.-long planks that allow a 1-ft. overhang on each end. However, install the two shingle courses above the jacks before you add the plank; otherwise, the plank will prevent you from nailing those courses. To prevent a plank from sliding out of a jack, nail through the hole in the front of the jack arm into the plank.
Plank-and-jack removal is a two-person job, especially in windy weather. Above all, play it safe. First, move the plank to a secure location. To remove a jack, sharply hammer its bottom upward, thereby driving the slotted jack holes off the 10d nails. Then, while being careful not to disturb the overlapping shingles, slide the jack out. It’s a good idea to drive jack nail heads flush, but it’s not imperative. To drive them flush, slide a flat bar under the overlapping shingle, placing it atop the nail head, then strike the bar’s handle with a hammer. This may require several blows.
Fine Homebuilding Recommended Products

Peel & Stick Underlayment

Roof Jacks

Ladder Stand Off

