Renewing a Deck
Replace damaged boards before recoating.

Need to buy a few years before a new deck is in your budget? If the essential structure of your deck is sound but the wood decking has rot and gaping cracks, with some judicious decking replacement and a cleaning and recoating, you can have a good-looking deck to serve in the interim.
Easily accomplished in two or three weekends, a deck renewal for a 20×20 deck can be done for under $500 worth of materials. Your only problem will be knowing where to stop. As soon as you replace a damaged board with a new plank, the old planks near it will look worse than ever. Begin by walking over the deck to mark all the serious damage. Replace the worst boards first. Then, if your time and budget permit, you can go back and replace a few others.
Your biggest nemesis will be the old fasteners. Galvanized nails hold like crazy and are very tough to pull out. Old deck screws are better behaved, though you might strip the occasional head. In rare cases, you may have to do a plunge cut with a circular saw either side of the fasteners and split the wood around them with a chisel.
Tip: If you have old galvanized nails that are really tough to remove, consider undercutting them with a reciprocating saw equipped with a metal-cutting blade. You’ll need to remove one plank to gain enough elbow room to undercut fasteners on the next.
The silver bullet in this process is deck-restoration coating. Variations cover cracks up to 1/4 in. in width and everything in between.
1. Pop the head with a nail puller. Also known as a cat’s paw, a nail puller cuts under the nail and gives you leverage for prying it out. Set the notched end of the head about 1/2 in. from the nail head and pound it so it cuts into the wood. Once the puller is under the nail head, pull back to pry the head above the deck surface.
2. Pry out the nail. Once the nail head is slightly away from the deck surface, work a pry bar underneath and pull the nail.
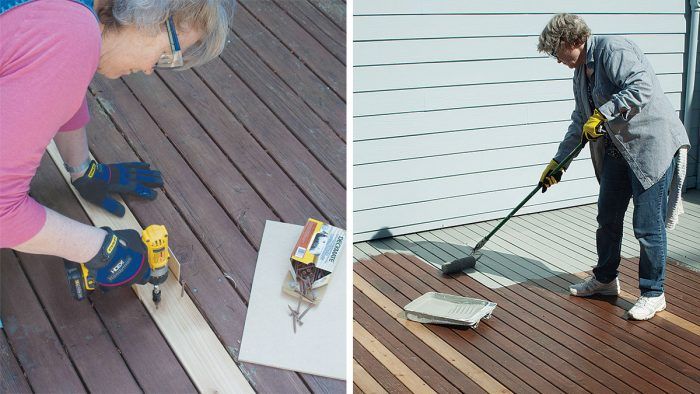
3. Add spacers and mark for fasteners. Using scraps of hardboard or plywood, cut spacers that match the spacing of the deck planks. Use a Speed Square to mark for lining up the fasteners in the new plank.
4. Install the decking. Fasten the planks with self-drilling deck screws. Drill pilot holes at the end of boards or anywhere you think there may be a danger of splitting.
To Sand or Not to Sand
If your decking is rough and splintery but without too many seriously damaged boards, you might want to sand it. If you choose to do so, you’ll have to set each fastener so it’s below the surface. Otherwise, you’ll tear up a lot of sanding disks. Opt for renting a floor sander with random-orbital heads. They’re easy to control and not prone to running amok like drum or single-disk sanders. If the deck is rough, start with 40-grit disks, working up to 120 grit.
5. Wash the deck. It is wisest to commit to one deck-restoration coating brand and follow its suggested steps using its products. The regimen begins with a cleaner and a stiff brush to remove dirt, mold, and loose finish. Rinse and allow the deck to dry completely.
6. Apply the primer. Primer helps the final coating adhere to weathered and previously stained wood. Apply the primer and let it dry.
7. Begin applying the restoration coating. Choose the type of restoration coating that best suits the condition of your deck. The coating options range from twice the thickness of paint to stuff that is as thick as a good chocolate malt. Use a brush along the house and in other tight areas.
8. Use a roller. For the field of the deck, use a roller on a pole. Choose the roller cover nap recommended by the coating manufacturer.
9. Keep a brush handy. For completely coating knotholes and deep cracks, keep a brush and pan close at hand.
10. Complete the deck. Plan out your painting scheme so you don’t paint yourself into a corner. Complete the deck and let it dry for the prescribed time—usually two days.
Fine Homebuilding Recommended Products

Angel Guard Deck Demon

Standard Marking Chalk

Metal Connector Nailer


