Installing a PVC Porch Ceiling
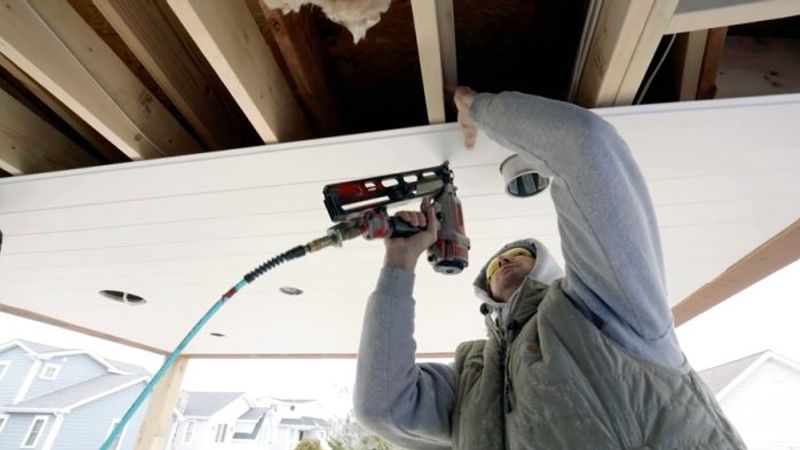
Justin Cline of Eldon Builders demonstrates the process of installing VERSATEX Stealth Beadboard on a porch ceiling during a comprehensive house remodel .
Sponsored by VERSATEX

In this video we catch up with Justin Cline of Eldon Builders, lead carpenter on a whole-house remodel on the New Jersey coast. To date, the builders have lifted the house 2 ft., completely gutted the interior, installed new windows, and air-sealed and insulated the building, and they are now tackling the trim and siding.
Narration: Today we’re focused on the rear of the house where they will be installing VERSATEX Stealth Beadboard on the porch ceilings, grooved side down as called for by the designer. Before installing the first board, Justin does a dry layout on the flat to physically determine the board’s starting point.
Justin Cline: So right now I am laying out what I have rough framing–wise for this soffit to fit in just so that I don’t end up with a small sliver at the end.
Narration: The goal of the layout is to ensure that the reveal established by the first board is the same on the final board on the opposite side. That means accounting for the box beam and the cove molding on the layout, both installed after the ceiling.
Justin: I reference this as the groove, and here is your tongue side. This is the piece you’re going to see, the finished product. And this is the framing. Here’s your 1x material, so what happens is you lose 3/4 in. of material there. So that’s kind of what I’m locating now and I’m going to kind of step off my material and by the time I get to the end, I’ll see what I have at the end. And if I need to adjust, I make my adjustment on the first piece and the rest is easy sailing.
I will take a few scraps and just work out something that looks like an even number and then do some simple math. So, three pieces, all snapped together, equals 16 in. on the nose. That gives me a good even number all the way through to see where that’s going to end up. I line up that mark with my V-groove, which is what I had referenced down there, snap those in, and now I have a good visual.
I have this mark here, which is the VERSATEX 1×8, and then I have 1/2-in. PVC sheet-stock siding. So, there’s my framing, here’s the number I referenced. I can see this is kind of crowded right there. So, if I were to shift this whole assembly 1-1/2 in. to the wall, I think we’ll be good. Your show on the wall will probably be about 4 in. there. If I shift everything down 1-1/2 in. like I did down there, this little space here ends up getting covered by the molding. So, you get nearly the whole board as a start, nearly a whole board as the end. This is going to be our starter line. I will snap that off our framing. Our line’s going to be 7-1/2 in. from that beam.
Narration: Before cutting the stealth boards, they need to locate where the side box beam will terminate to measure for length. For expansion and contraction, Justin will subtract 1/2 in. from the overall measurement to leave a 1/4 in. gap at each end.
Justin: We have a stack of boards here ready to go, cut to length, and we’ve got our line snapped. We’re going to hold it up, nail to the line, and snap in that tongue and groove, and away we go.
Narration: They position the first piece right to the chalkline with Justin using his carpenter’s pencil to maintain the 1/4-in. gap. Then they hold the line at every joist and nail it all.
Justin: We’re using 2-in.-long, 15-ga. stainless steel nails in our coastal environment.
Narration: With the first board installed, they have a secure, straight guide to quickly line up subsequent boards, ensure edges are tight, and fasten away.
Justin: We have it so that the heads are just below flush so they’re not really blowing out the soft cellular PVC. All these nail holes get filled, sanded, and painted. Here I mark the center of the light—he is doing the same thing down there—and we’ll pull from one point, and get two numbers for the cut guy.
 Narration: Because the light holes land between two adjacent boards, they sister them together and use clamps to hold them steady while they make a single pass for each hole using a hole saw matched to the light’s housing. With a little manipulation, the boards snap in place, and they move on.
Justin: We are good. This goes together just like we had on the table.
Narration: For electrical boxes and larger holes like speakers, they switch to a jigsaw working carefully to get clean, accurate cuts so all the fixtures trim out nicely. Then it’s just a matter of accuracy and repetition until they reach the house with the final board.
Justin: This is the moment of truth. This is where the layout should prevail. We’ll have a 1/2-in. PVC sheet stock siding, a 1x face, and then a molding eliminating any sort of little piece. (Any sort of crowding here, it’s going to throw off your eye aesthetically.)
RELATED STORIES


