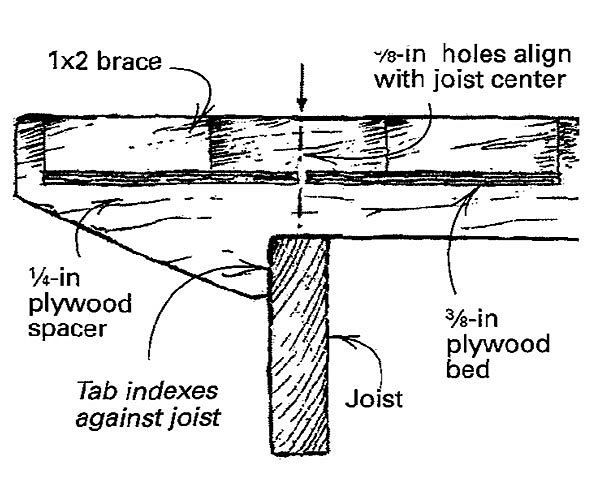
The device shown in the drawing is a combo tool that both controls the distance between boards in a deck and guides the placement of the nails or screws. Here’s how it works.
The part that controls the spacing is a piece of 1/4-in. plywood. It fits between the deck boards and has a tab that indexes against the side of the joist. The horizontal bed of the guide is made of 3/8-in. plywood. It’s screwed to the spacer by way of 1×2 blocks. A couple of 3/8-in. holes drilled in the bed align with the center of the joist.
To use the guide, you simply place it on a deck board. Snug the board next to its already installed neighbor, and slide the guide toward the joist until the tab engages the joist. Drive the nails through the holes, slip the guide over the nails and set the nails. If you’re near a wall or a post, use the notches on the ends of the guide to position the nails.
This guide costs nothing, protects and spaces the boards, lines up the nails in tidy rows and prevents joist splitting. It makes for fast and meticulous workmanship.
John Gibbons, EastSooke, None


